Pages

Saturday 14 December 2013

Butter Chicken Masala


Butter Chicken Masala 

This Butter Chicken recipe is quite different in taste from the one I usually make. I had bought the Zaiqa Butter Chicken Masala packet and I wanted to try the recipe as written on the packet. It was very different in taste from the regular Butter Chicken Masala but flavor-wise, though different, it hit all the right spots.

Ingredients for Marination:

2 tablespoons Zaiqa Butter Chicken Masala
1 teaspoon lime juice
1-2 tablespoons curd/plain yogurt
1 teaspoon salt

Ingredients for Gravy:

2 tablespoons butter
2 tablespoons oil
2 onions, ground to paste or chopped very fine
4 tomatoes, ground to paste (boiled & de-skinned) or 1 cup tomato puree
2 tablespoon ginger garlic paste
500 grams chicken boneless pieces
1 teaspoon dry kasoori methi leaves/dry fenugreek leaves
3 tablespoons Zaiqa Butter Chicken Masala
1 tablespoon tomato ketchup or 1 teaspoon sugar
Salt, to taste
1 cup milk
2 tablespoon cream
1 teaspoon cream, to garnish
Oil, as needed, for pan-fry/grilling

Method:

  1. Marinate chicken pieces in Zaiqa Butter Chicken Masala, lime juice, curd and salt.
  2. Leave to marinate for a minimum of 30 minutes.
  3. Pan fry or grill. When cooked, keep aside for use in the gravy.
  4. Heat 2 tablespoons oil and 2 tablespoons butter in a kadai/wok. Sauté the onion paste, or very finely chopped, till the raw onion smell evaporates.
  5. Add 2 tablespoons ginger-garlic paste, sauté well.
  6. Add ground tomatoes or 1 cup tomato puree. Sauté till the raw tomato smell evaporates and oil separates.
  7. Add chicken pieces, sauté for 5-7 minutes on low heat.
  8. Add Zaiqa Butter Chicken Masala, kasoori methi leaves, salt to taste, sauté.
  9. Add milk (very gradually), and allow to simmer for a few minutes till the gravy reaches the desired consistency.
  10. Add cream, tomato ketchup, or sugar, simmer on very low heat for 10 minutes.
  11. Garnish with butter and cream. Serve with naan or parathas. 
Chef Notes: 

  1. Vegetarians can use cottage cheese/paneer instead of chicken to make a vegetarian version of this recipe. 
  2. The recipes asks for boneless pieces but I’m not very fond of boneless chicken hence opted for drumsticks.
  3. I used the Zaiqa brand of Butter Chicken masala that I bought online. It’s a spice blend manufactured by Zaiqa – The Spice Store. To buy their spices visit their Face book page ‘Zaiqa - The Spice Store’ and message Anisa Arif for the same. 
  4. You may share the direct blog-link of the recipe/s but do NOT publish my recipes and my photographs on any blog-site or website without my explicit consent or attempt to pass off my recipe/s as your own. You will be held accountable for plagiarism. 


Thursday 28 November 2013

Sindhi Chicken Biryani

                                
Sindhi Chicken Biryani

Deliciously aromatic is how I would describe this dish. This Biryani is quite different from the ones I usually make. The base recipe was on the back of the Sindhi Biryani packet that I used, but I've tweaked a few proportions to my liking. Sindhi Biryani masala contains dried plums. I made Sindhi Biryani for the first time and the plums in the masala took the Biryani to a different high from the regular Biryani. Even my ever fussy Grumpy Tomcat [read: husband ;-) ] loved the flavor it imparted to the dish. If you have Sindhi Biryani masala available in your part of the world, do give this a try.

Ingredients:

10 tablespoons oil
2 cloves
2 cardamoms
2 one inch pieces of cinnamon
5 large onions, sliced
2 tablespoons ginger-garlic paste
1 kilo chicken, cut into 10-12 pieces
5 large tomatoes, grated
5 green chilies, very finely chopped
1 teaspoon turmeric powder
5 tablespoons Sindhi Biryani masala (I used Zaiqa brand)
Salt, to taste
450 grams basmati rice
1 clove
1 cardamom
1 inch piece cinnamon
1/3rd teaspoon black cumin/shahjeera
2 pinches saffron
¼ cup hot milk
2 tablespoons butter
2 onions, sliced and fried golden brown, for garnish

Method:

  1. Steep saffron in hot milk. Cover and keep aside.
  2. Heat oil; add 2 cloves, 2 cardamoms, 2 pieces of cinnamon and sauté for a few seconds.
  3. Add the onions and fry till golden brown.
  4. Add ginger-garlic paste and sauté.
  5. Add green chilies, turmeric powder, Sindhi Biryani masala, salt and sauté.
  6. Add tomatoes and sauté till oil separates.
  7. Add chicken pieces and sauté for about 5 minutes on medium heat. Lower heat and cook chicken, covered till 80% done. (You will not need to add any water as because the chicken is covered and cooked on low heat the gravy and the moisture from the chicken will be enough to cook the bird)
  8. Wash and soak the basmati rice in water for 20-30 minutes. Drain.
  9. Heat a large vessel with water. Add 1 clove, I cardamom, I cinnamon, black cumin, salt and bring to a rapid boil.
  10. Add the drained rice and par-boil till 80% done. Drain the rice in a sieve.
  11. Layer the chicken and the gravy in a vessel. Cover with the par-boiled rice.
  12. Spoon over the saffron and the saffron milk over the rice.
  13. Add a few blobs of butter over the rice. Garnish with fried onions.
  14. Cover the vessel tightly with a lid. (Make dough with regular plain flour and sealed the entire edge of vessel and lid to ensure it doesn’t lose any of it’s flavor while cooking on low heat / cooking on ‘dum’)
  15. Cook this on very low heat for 30 minutes. After 30 minutes remove the dough from the lid edge.
  16. Serve Biryani with plain yogurt or yogurt raita. 
Chef Notes:

  1. If Zaiqa spices are not available to you feel free to use any brand of Sindhi Biryani masala. If you do wish to procure Zaiqa spices visit their Face book page ‘Zaiqa The Spice Store’ and message Anisa Arif for the same.
  2. For those of you who don’t know, cooking on ‘dum’ means sealing the edges of the vessel with dough to ensure the steam doesn’t escape and it also helps retain the flavor of the dish. Cooking on ‘dum’ is always done on very low heat. 
  3. You may share the direct blog-link of the recipe/s but do NOT publish my recipes and my photographs on any blog-site or website without my explicit consent or attempt to pass off my recipe/s as your own. You will be held accountable for plagiarism. 


Al Faham Chicken with Al Faham Curry Dip


Al Faham Chicken with Al Faham Curry Dip

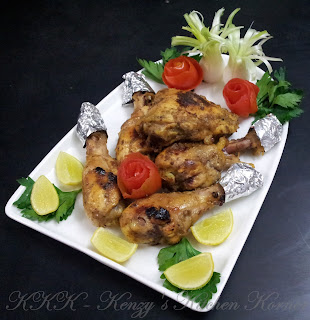
This same recipe can also be made using paneer (cottage cheese) or baby potato (pricked with a fork) if you’re a vegetarian but of course the carnivore in me just had to go with chicken. ;-)

Ingredients:

500 gms chicken, boneless breast pieces (I preferred to use drumsticks and thigh pieces)
1 cup curd/plain yogurt
2 tablespoons ginger-garlic paste
2-3 teaspoons Al Faham Masala (Zaiqa brand)

Ingredients:

  1. If using boneless chicken breasts, slit the breast to flatten it to a big flat piece and hammer lightly with meat mallet to flatten. (I put light slits on the drumsticks and thigh pieces as we usually do when making tandoori chicken)
  2. Beat the curd to smoothen it. Add ginger-garlic paste, Al Faham masala to the curd. Marinate the chicken in the curd masala for 4 hours (You may marinate it longer. I marinated it for 7 hours)
  3. Remove the excess marinade and grill the chicken on a bbq, or under the grill in an oven or pan-grill it on a stove until the chicken is cooked and juicy. (I pan grilled it in a non-stick pan with about 5 tablespoons oil)
  4. When the chicken is nearly done baste chicken with butter to heighten the flavor of the chicken. Serve with lemon wedges and salad of your choice. (I used the remaining marinade to made a spicy curry dip and served that with the chicken).

Al Faham Curry Dip

Ingredients:

Leftover Al Faham marinade in which the chicken had been marinated
1 small onion, finely chopped
1 small green chilies, finely chopped
1 large tomato, cut in half, grated
¾-1 teaspoon cayenne pepper (or as desired)
Salt, only if needed
1 tablespoon butter
Sugar to taste
2 sprigs of coriander, chopped

Method:

  1. Heat butter, gently. Do not allow it to burn.
  2. Add onions, green chili and fry till golden brown.
  3. Add cayenne pepper and sauté.
  4. Add grated tomatoes. Sauté till tomatoes are cooked and specks of butter appear on the surface of the gravy.
  5. Add the leftover marinade, mix and allow to cook over gentle to medium heat till gravy thickens to a ‘thick dip’ consistency.
  6. Check for salt. Add sugar to balance out the flavor of the gravy.
  7. Garnish with coriander leaves and serve with Al Faham chicken. 
Chef Notes: 

  1. The proportion of marinade was quite a lot after draining the chicken from it, for grilling, and I didn't want the marinade to go waste hence decided to make a spicy dip from the remaining marinade.
  2. Al Faham BBQ/Grill is a special blend of spice I bought online. It’s a spice blend manufactured by Zaiqa – The Spice Store. To buy their spices visit their Face book page ‘Zaiqa - The Spice Store’ and message Anisa Arif for the same. 
  3. You may share the direct blog-link of the recipe/s but do NOT publish my recipes and my photographs on any blog-site or website without my explicit consent or attempt to pass off my recipe/s as your own. You will be held accountable for plagiarism. 


Wednesday 2 October 2013

Chicken Fiesta Pizza with Homemade Pizza Sauce


Chicken Fiesta Pizza with Homemade Pizza Sauce

I haven’t tried my hand at baking bread/s hence I usually buy readymade thin crust bread base for my pizzas. I’m sharing this recipe is because the pizza sauce, that I make from scratch, is delicious. This pizza sauce is courtesy my sis-in-law Khorshed. She taught me how to make this sauce years ago. For me, no other pizza sauce compares to this. As for the toppings, feel free to use whatever suits your fancy.

Ingredients for Sauce:

4 large onions, finely chopped
100 grams mushrooms, sliced
20 cloves garlic, finely chopped
1 teaspoons ginger-garlic paste
1 teaspoon red chili-garlic paste
½ -1 teaspoon Kashmiri chili powder
3 packets tomato puree
1 tablespoon soy sauce
1 tablespoon chili sauce
2 medium sized green capsicum, finely chopped
4 tablespoons sugar (or to taste)
Salt, to taste
¾ -1 tablespoon vinegar (or to taste)
2–3 tablespoons corn flour mixed in ¼ cup water

Extra Ingredients:

3 chicken breasts, boiled and cut into small cubes
6 chicken frankfurters, lightly sautéed and cut into diagonal rings
6 to 8 slices of chicken salami, lightly sautéed and cut into pieces
1 onion, sliced for garnishing
1 medium capsicum, chopped for garnishing
100 grams mushrooms, sliced for garnishing
400 grams Mozzarella cheese (if you’re a health/diet conscious person please use less)
6 six inch pizza breads
Oil
Butter, to dot

Method for Pizza Sauce:

  1. Heat some oil and fry the finely chopped onions till translucent. Throw in the garlic and sauté.
  2. Add the ginger-garlic paste, red chili-garlic paste, and red chili powder and fry well.
  3. Add tomato puree, soya sauce, chili sauce and let it cook till the tomatoes change to a darker color and lose the raw taste n smell.
  4. Add the cubed chicken pieces, finely chopped mushrooms, capsicum pieces and cook for about 2-3 minutes.
  5. Add the vinegar, sugar and salt. (Adjust all three according to your taste.) Allow to cook for a minute more.
  6. Gradually (one tablespoon at a time) add the corn flour mixture to the tomato gravy. It should be of thick, spreadable consistency. 
Method for Pizza:

  1. Take a pizza bread, spread the chicken pizza sauce, layer with mushroom slices (I prefer to put the mushroom on the sauce instead of putting them on top coz on grilling the pizza they tend to turn dark and look very ugly if you are planning to click a picture).
  2. Top the mushrooms with mozzarella cheese and then top the cheese with sausage, salami, capsicum and onion pieces.
  3. Dot the top of the pizza with a wee bit of butter and grill for about 15-20 minutes or till done and cheese melts and bubbles. 
Chef Notes: 

  1. This quantity makes six 6” pizzas.
  2. I have given the exact amount of sugar and vinegar as used by me but I advise you to add both, sugar and vinegar, little by little, and adjust the flavor to your liking when you use it.
  3. I have chosen chicken as the topping. Feel free to use whatever topping you prefer.
  4. I put the mushrooms on the sauce instead of putting them on top (because on grilling they turn dark and spoil the look of the pizza, more so if you are planning to click a photo of it.
  5. You may share the direct blog-link of the recipe/s but do NOT publish my recipes and my photographs on any blog-site or website without my explicit consent or attempt to pass off my recipe/s as your own. You will be held accountable for plagiarism. 

Sunday 29 September 2013

Chicken Chettinad


Chicken Chettinad

Spicy and aromatic, this superb ‘Chettinad’ recipe hits all the right spots. The original Chettinad recipe does not have cashews or cream in its list of ingredients. I wanted to give the recipe a twist of my own, hence have used cashews and cream to enhance the texture of the gravy. With the amount of spice involved you may feel it will be unbearably spicy but it’s not. The spice level is absolutely perfect! The flavors blend beautifully. Enjoy!

Ingredients:

1 chicken (about 800 grams), cut into 10 pieces
7 tablespoons oil
2 onions, chopped fine
15 curry leaves
4 large tomatoes, pureed
¼ teaspoon turmeric powder
¾ teaspoon red chili powder
3” piece ginger
10 large flakes garlic
1 tablespoon poppy seeds / khus-khus
35 grams cashew nuts, broken into pieces
1 cup cream, gently smoothen with a whisk or fork
Salt, to taste
Coriander leaves, chopped, to garnish


Chettinad Masala:

½ cup freshly grated coconut
1 teaspoon coriander seeds
1 teaspoon fennel seeds
½ teaspoon cumin seeds
2½ teaspoons peppercorns
9 whole red Kashmiri chilies
3 green cardamoms (use only seeds)
3 cloves
1” cinnamon stick
1 tablespoon oil

Method:

  1. Soak poppy seeds and cashew nuts in a little warm water for 15 minutes.


  2. Heat 1 tablespoon oil in a pan. Add coconut, coriander, cumin, fennel, red chilies, cloves, cinnamon and seeds of cardamoms to the oil. Stir fry till fragrant and remove from fire.


  3. Drain poppy seeds and cashew nuts.
  4. Grind the roasted masala with the drained poppy seeds, cashew nuts, ginger and garlic to a smooth, thick paste with ½ cup water.


  5. Heat oil in a kadhai/wok or a heavy bottomed vessel, add the chopped onions. Fry till light brown.


  6. Add salt, turmeric, red chili powder and sauté for a few seconds. Add the pureed tomatoes. Sauté tomatoes till they are cooked and oil separates.


  7. Add the ground paste, sauté for two minutes.


  8. Add chicken pieces and curry leaves and cook, stirring intermittently, for 2 minutes.
  9. Add 3 cups water, cover and cook. Keep stirring carefully, once every 5 minutes, while the chicken is cooking. Cook till the chicken is tender and the gravy thickens. Keep aside till serving time.


  10. At serving time reheat the chicken; lower heat, add 1 cup smoothened cream. Keep on low heat, stirring continuously till it simmers gently.
  11. Garnished with coriander leaves. Serve with onions rings and lime wedges.

Chef Notes:

  1. If you reside in a country that has strict laws in regard to using poppy seeds, you may substitute it with extra cashew nuts.
  2. Whenever a recipe asks for cream, always opt for Amul low-fat cream. Using cream helps retain the texture of the gravy. That way you get to use cream, retain the texture of the dish and you save up on added calories that you just can't avoid if using heavy cream. If you are extremely health-conscious, use half the quantity of cream.
  3. You may share the direct blog-link of the recipe/s but do NOT publish my recipes and my photographs on any blog-site or website without my explicit consent or attempt to pass off my recipe/s as your own. You will be held accountable for plagiarism.

Vegetable-Lentil Low Cal Soup


Vegetable-Lentil Low Cal Soup

To a foodie like me the word ‘low-cal’ brings to mind the words tasteless, insipid and ‘NO’. When I tried this soup I was proved totally wrong. Here’s a low cal soup recipe that’s truly yummy but don’t take my word for it. Give it a shot and check it out for yourself. It’s healthy and it fills you up when you’re on a diet. A soup-stick or two with it turns it into a full meal. I kid you not!!

Ingredients:

2 tablespoons split red lentil/orange masoor dal, wash and soak for 20 minutes
1 small 2” aubergine/egg plant/baingan, chopped into 4 pieces
2 inch piece bottle gourd/dodhi, chopped into 6 pieces
½ - 1 carrot, peeled and chopped
2 spinach leaves, washed and roughly torn into 2-3 pieces
½ -1 green chili, chop into two pieces
1 onion, roughly chopped
1 tomato, roughly chopped
2 cloves garlic
1/8th teaspoon mustard seeds
1/8th teaspoon cumin seeds
3 curry leaves
Salt, to taste
Pepper powder, to taste
Few sprigs coriander leaves, finely chopped
Lime juice, to taste (optional)

Method:

  1. Heat a pan and lightly dry roast the mustard, cumin and curry leaves for a minute till a nice aroma rises. Do not burn it.
  2. In a pressure cooked add the dal, aubergine, bottle gourd, carrot, spinach leaves, green chili, onion, tomato, garlic, roasted seed mixture and salt.
  3. Add 2 to 2½ cups of water and pressure cook for 2 whistles. Lower flame and cook for 2 more minutes and shut off the stove.
  4. Open cooker when all the pressure releases and when mixture is lukewarm, grind the soup in a grinder.
  5. Add pepper powder to taste and adjust salt if needed. Reheat and add finely chopped coriander and lime juice (optional) just before serving.
  6. Serve with baked croutons or soup sticks. 
Chef Notes: 

  1. You can add a piece of chicken to enhance the flavor of the soup. I’m a hard-core non-vegetarian and yet I don’t feel the need to add chicken because the soup by itself is so flavorsome and delicious. If you do use chicken, please remember to remove the piece of chicken before you grind the soup. Re-add it after you puree the soup.
  2. Instead of split red lentil/orange masoor dal you can also make this with split red gram/tur dal. 
  3. You may share the direct blog-link of the recipe/s but do NOT publish my recipes and my photographs on any blog-site or website without my explicit consent or attempt to pass off my recipe/s as your own. You will be held accountable for plagiarism. 

Sunday 15 September 2013

Kharu Bheju (Brains in Onions Masala)


Kharu Bheju (Brains in Onion Masala)

A Parsee delicacy made from goat brain. There are always jovial-disagreements in most Parsee families when our mom or grandma/s brings these babies home from the market. A few people in the family prefer cutlets while the other few want them cooked in the style mentioned below. To ensure that no dispute ensues at home I usually bring 12-14 brains at a time so that I can cook half of them as cutlets and the rest of them in this delicious masala. It's not easy cleaning so many brains all at one time but the smiles i get from each family member is so worth the trouble.

Ingredients:

7 brains, cleaned and kept whole
8 large onions, chopped fine
7 tomatoes, grated
1 tablespoon ground ginger
1 tablespoon ground garlic
1 teaspoon turmeric powder
1 teaspoon red Kashmiri chili powder
¼ teaspoon garam masala powder
1 teaspoon coriander-cumin powder powder
Salt, to taste
7-9 tablespoons oil
A big handful of coriander leaves, chopped fine

Method:

  1. Fry the onions in oil till light brown (still a wee bit translucent) in a large flat non-stick pan.
  2. Add the ginger garlic paste and saute till you smell a nice aroma.
  3. Add the turmeric powder, red Kashmiri chili powder, garam masala powder, coriander-cumin powder, salt and fry till oil separates (do not let the masala burn).
  4. Add the grated tomatoes and fry till the raw smell evaporates and oil separates.
  5. Add the coriander leaves (leaving a wee bit for garnishing) and give it a stir.
  6. Carefully lay out the brains one at a time in the vessel. Give a careful but good shake to the pan so as to cover the brains with the masala. (I prefer not to use a spoon here)
  7. Cover and cook for 5 minutes till brains are cooked.
  8. Garnish with the rest of the chopped coriander and serve with rotis, naan or parathas.

Chef Notes:

  1. Brain is not everyone’s plate of food (read: cuppa tea) but those who relish it will love this recipe.
  2. Instead of gently shaking the vessel, if you do plan to use a spoon to mix the masala with the brains, please do so very carefully and gently so as not to bruise or mush up the brains.
  3. This can also be made with the brain from a larger animal (eg: cow or buffalo) but the taste will be slightly sharper and because the brain is larger in size, do not leave it whole. Cut it into 4 to 6 pieces.
  4. You may share the direct blog-link of the recipe/s but do NOT publish my recipes and my photographs on any blog-site or website without my explicit consent or attempt to pass off my recipe/s as your own. You will be held accountable for plagiarism. 


Khichdee (Pish-pash style)


Khichdee (Pish-Pash Style)

Simple though they may be, there are some dishes you just can't get enough of. This is one such dish. I can describe this dish in one word. Soul-food! Simple and yet so satisfying. As I type this recipe the craving for this dish stirs in my heart, yet again, and I have half a mind to tell Anu (my daughter from another mother) to dump the prawn curry she’s made for dinner and make this. ;-) I dare not though, not unless i want to be growled at. :P 

Made with Yellow Split Moong Dal 
Ingredients:

½ cup yellow split green gram/yellow moong dal
½ cup rice
¼ teaspoon turmeric powder
6 black peppercorns + 5 extra peppercorns
Salt, to taste
1½ tablespoons clarified butter/ghee (I use a wee bit more because my family loves the taste of ghee in dals and khichdee)
A few curry leaves
½ teaspoon cumin seeds/jeera

Made with Green Gram Split (Moong Chilka)

Method:

  1. Wash and soak the rice and dal together for about 20 minutes. Drain.
  2. Add the dal and the rice into a pressure cooker. Add turmeric powder, 6 peppercorns, salt and 2¼ cups water.
  3. Pressure cook for 3-4 whistles and set aside for a while to reduce steam then open the cooker.
  4. Just before serving, heat ghee in a separate vessel; splutter the curry leaves, remaining 5 peppercorns and cumin seeds.
  5. Pour the ghee mixture over the khichdee and serve hot.


Chef Notes: 

  1. The same Khichdee can be made with split red gram/ahar dal/toor dal.
  2. Peppercorns used for tempering can be substituted with 2 cloves and half an inch of cinnamon. You may even use dry red chilies along with the whole spices to temper the Khichdee. 
  3. You may share the direct blog-link of the recipe/s but do NOT publish my recipes and my photographs on any blog-site or website without my explicit consent or attempt to pass off my recipe/s as your own. You will be held accountable for plagiarism. 

Monday 2 September 2013

Crispy Ritzy Cheddar Chicken


Crispy Ritzy Cheddar Chicken

This one turns out perfect. It’s one of those recipes that just don’t go wrong. Chicken, cheddar and crackers, what could possibly go wrong with such a superb combination? If you have fussy kids at home (or as in my case, a Grumpy Tomcat), trust me, you will see all the fuss vanish in a jiffy when you set this down in front of them. Enjoy!!

Ingredients:

4 large chicken breasts
2 sleeves Ritz crackers (for places where imported crackers aren’t available feel free to use Monaco or any other crackers)
¼ teaspoon salt
¼ teaspoon pepper
½ cup full fat milk
3 cups cheddar cheese or smoked cheddar cheese, grated
1 teaspoon dried parsley

Sauce:

1 can (approx 10 ounce) cream of chicken soup
2 tablespoons sour cream
2 tablespoons butter

Method:

  1. Crush the crackers. Keep aside.
  2. Cut each chicken breast into two large pieces.
  3. Toss the salt and pepper into the cracker crumbs and combine to mix well.
  4. Dip each piece of chicken into the milk.
  5. Roll the breast pieces into the grated cheese. Press the cheese into the chicken with your fingers to make the chicken as cheesy as possible.
  6. Finally, coat the chicken on all sides with the crackers crumbs.
  7. Grease a pyrex bake dish with cooking spray or oil/butter and arrange the chicken in the baking dish.
  8. Sprinkle dried parsley over the chicken. Cover the pyrex dish with aluminum foil and bake at 400 deg F/200 deg C, for 35 minutes.
  9. Remove the foil and bake for an additional 10-15 minutes, or until the edges of the chicken are golden brown and crispy. 
Method for Sauce:

  1. Heat the cream of chicken soup, sour cream and butter in a saucepan.
  2. Using a whisk, stir it over medium low heat until the sauce is nice and hot. Serve over the chicken. 
Chef Notes: 

  1. When you make the sauce please stir it continuously and cook it over medium low heat so that it does not split.
  2. You can also make simple light version of white sauce or a tangy tomato based compote and spoon it over the chicken instead of the chicken soup-sour cream sauce. Go with whatever floats your boat. 
  3. You may share the direct blog-link of the recipe/s but do NOT publish my recipes and my photographs on any blog-site or website without my explicit consent or attempt to pass off my recipe/s as your own. You will be held accountable for plagiarism.
Sunday 1 September 2013

Chicken Handi


Chicken Handi

Who would have thought a bit of this and a bit of that would result is something so finger-lickin’ good. The base recipe belongs to Michelle Taylor. This isn’t the authentic recipe for ‘Chicken Handi’ but Michelle being Michelle, actually named it, ‘Throw everything in the bloody Handi Chicken’ :-) hence I have named it Chicken Handi. I have tweaked the quantity of certain ingredients to my liking but the base recipe belongs to Michelle. 

Michelle, thanks ever, ever so much for sharing this recipe <3

Ingredients:

1 kilo boneless, skinless chicken breasts, cut into thick strips
5 potatoes, peeled and cut into 1” rounds
4 cups onions, chopped very fine
4 medium tomatoes, cut into half and grate, discard skin
2 green chilies, finely chopped
2 tablespoons ginger-garlic paste
4 tablespoons or 50-60 grams cashew nuts, ground to a paste
4 teaspoons cumin powder/jeera powder
4 teaspoons coriander powder/dhania powder
3-4 teaspoons red Kashmiri chili powder
½ teaspoon turmeric powder/haldi
1 teaspoon garam masala powder
1½ teaspoon dry fenugreek leaves/kasoori methi, lightly roasted and crushed
1 cup fresh cream
Oil, enough to cover the bottom of the vessel (don’t be stingy coz it’s a richly flavored recipe)
Salt, to taste

Method:

  1. Heat oil in a large thick bottomed vessel. Add the onions and fry till golden brown.
  2. Lower the heat and add the green chilies, ginger-garlic paste and fry for a minute till fragrant.
  3. Add the coriander powder, cumin powder, chili powder, turmeric powder, garam masala powder, salt and sauté well.
  4. Add the tomatoes and cashew paste and cook till oil separates and the tomatoes are devoid of the raw smell.
  5. Add half a cup of water and cook the gravy some more till semi-dry and appears almost ‘paste-like’.
  6. Add the chicken and potatoes. Stir well so as to ‘bhuno’/sauté the chicken and potatoes a wee bit.
  7. Add water to cover the chicken and potatoes. Cover and cook till done.
  8. Check seasoning (salt).
  9. Just before serving add the crushed kasoori methi and pour the fresh cream and give the vessel a gentle whirl, tilting it around so that the cream mixes in or if give it a gentle mix with a spoon.
  10. Simmer on very gentle heat for two minutes.
  11. Serve with plain rice, pea/jeera pulao or bread naan. 
Chef Notes: 

  1. It’s such an easy-peasy recipe that there really isn’t much to write as ‘chef note’s’ but I will say, as I always do, that you can adjust the red chili powder, cumin powder and coriander powder depending on your tolerance of spice level.
  2. You may share the direct blog-link of the recipe/s but do NOT publish my recipes and my photographs on any blog-site or website without my explicit consent or attempt to pass off my recipe/s as your own. You will be held accountable for plagiarism. 


Tuesday 16 July 2013

Eda Chutney Na Patties – Egg Chutney Patties


Eda Chutney Na Patties – Egg Chutney Patties
Makes 6 big (actually huge) patties

This one comes to you from a Parsee kitchen. It’s a Parsee delicacy and a Bawa needs no special occasion to make this. We’ll gobble these anytime, anywhere. :-) There was a time when, as a kid, I hated chutney. When I entered the kitchen arena as a teenager and began trying out new textures and flavors, I could have kicked myself for being stubborn so as not to try it earlier. (Yes, mom you were right, as always. I admit it’s delicious). Spicy-tangy coriander-mint chutney and eggs beautifully encased in mashed potato. What could go wrong with that??

Ingredients:

3 eggs, boiled, shelled and cut into two
1-1¼ kilo potatoes, boiled, peeled and smoothly mashed
Salt, to taste
½  - 1 cup semolina
2 eggs, beaten and seasoned with salt
Oil, to fry
2 tablespoons oil, to grease palms (literally :-) )

Ingredients for Chutney:

½ coconut
1 bunch coriander leaves
1 bunch mint leaves
10-12 green chilies
6-7 cloves garlic
1 teaspoon jeera (cumin seeds)
3 medium sized raw mangoes, (use to taste depending on the amount of acidity best suited to your taste buds - when not in season use lime juice)
Salt, to taste
Sugar, to taste

Method for Chutney:

  1. Grind all the ingredients to a thick chutney. (The chutney has to be really thick therefore if you can grind it without adding water that would be superb, but if your grinder blades need that wee bit of nudge, then add a wee bit.)
  2. When done, keep aside. 
Method for the Patties:

  1. Season the mashed potatoes with salt.
  2. Oil the palm of your hands so that the mashed potato doesn't stick, take a big lump of mashed potato and shape it to form a deep cup.
  3. Add half an egg and a big spoonful of chutney into the cup and carefully work your way to closing the cup to form a pattie. Set the made pattie on a thali sprinkled with a little semolina. (This way the patties wont stick to the thali/plate and it will be easier to handle when you lift it)
  4. Repeat till all the potatoes and eggs are used up.
  5. Roll the patties in the remaining semolina, dip in beaten-seasoned eggs and fry in oil till golden brown on all sides. 
Chef Notes: 

  1. Refrain from adding too much water when grinding the chutney because the chutney has to be really thick to ensure it doesn't seep out of the patties when you fill it with chutney.
  2. Preferably make the chutney a day in advance and keep it in the fridge. I usually do that because the chutney becomes a wee bit firmer and easier to handle when refrigerated.
  3. When you make the patties, ensure there are no cracks in the outer potato layer. The smoother the pattie the less chance of it splitting during the frying process.
  4. This quantity makes six huge patties. You may quarter the eggs instead of halving them and make smaller patties and that will yield twelve patties instead of six. 
  5. You may share the direct blog-link of the recipe/s but do NOT publish my recipes and my photographs on any blog-site or website without my explicit consent or attempt to pass off my recipe/s as your own. You will be held accountable for plagiarism. 

Friday 28 June 2013

Afghani Chicken

Afghani Chicken 

The name of this dish is ‘Afghani Chicken’ but this recipe comes to you from a very authentic Parsee recipe book. Maybe some Parsee ancestors decided to settle in that part of the world for a while, when we were forced to flee Persia during the persecution and happened to pick up this gem from that region. Then again, maybe it was just a weird Bawa feeling the urge to name it so. These are the only (in)sane reasons that comes to mind for a Parsee naming the dish so. Well, food knows no religion or language. What matters is how it tastes, so regardless of whether it is India, Persia/Iran or Afghanistan, I vouch that this one tastes awesome. Enjoy!

Ingredients:

1 kilo chicken
4 onions, sliced
4” piece ginger
1 whole pod garlic
½ teaspoon turmeric powder/haldi powder
1 bunch coriander leaves
2 green chilies, slit
¼ kilo curds, beaten smooth
A few strands saffron
2 potatoes, peeled, quartered and fried
125 grams ghee/clarified butter
2 hard boiled eggs, quartered
Salt, to taste

Grind to paste:

1 tablespoon poppy seeds
10 peppercorns
7 white cardamoms
8” cinnamon
7 cloves
2 green cardamoms
1 tablespoon cumin
30 grams dry coconut
½ tablespoon charoli/chironji
4 dry red Kashmiri chilies

Method:

  1. Clean and wash the chicken and cut into the required number of pieces.
  2. Grind the ginger-garlic together to a paste.
  3. Fry onions in ghee until golden brown and keep some aside for garnishing.
  4. Add ginger-garlic paste to the onions in the ghee and fry well for a minute.
  5. Add turmeric powder, green chilies and fry well for a few seconds.
  6. Add the ground paste and fry well till ghee separates. Add coriander leaves and fry for a few more seconds.
  7. Add chicken pieces, salt and mix well. Add water and cook till chicken is nearly done. Blend in curds.
  8. Mix saffron with a little warm water and let it steep for a while, then add to the chicken.
  9. Simmer the gravy till thickened to desired consistency.
  10. Garnished with fried potatoes, hard boiled eggs and fried onions. Serve with parathas or tandoori naans. 
Chef Notes: 

  1. If you reside in a country where they have strict restrictions in regard to the use of poppy seeds, feel free to substitute them with cashew nuts. 
  2. The potatoes were to be quartered and fried but I prefer them as chips or wedges hence opted to cut them as accordingly. 
  3. You may share the direct blog-link of the recipe/s but do NOT publish my recipes and my photographs on any blog-site or website without my explicit consent or attempt to pass off my recipe/s as your own. You will be held accountable for plagiarism.